

Welcome to day 2 of the sew-along. If you are using ready made bais tape, you can skip making your own bias tape and get started with your bodice.
Note: All seam allowances are 1/2" unless noted otherwise.

If you are not using ready made bias tape, refer to the Make Your Own Bias Tape tutorial we posted on Friday. You will need bias tape for the neckline, sleeve hems, and skirt hem.
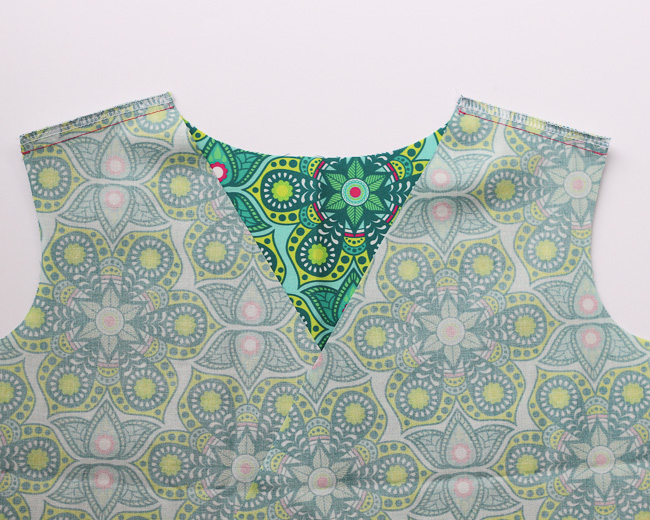
Now, lets get sewing!! Lay the bodice back on a flat surface with the right side up. Place the bodice front pieces right sides together with the back bodice. Stitch along the shoulder seams. Finish the seams with a serger or zig-zag stitch.

Press the seam toward the front of the bodice and topstitch 1/8" from the seam.

Open up the 1/2" bias tape and pin one long edge along the neck opening right sides together. Begin at the one lower point of the criss-cross bodice piece and end at the other lower point. Extend the tape beyond the base of the bodice, so you can trim it even later.

Stitch the bias tape to the bodice along the first fold line of the bias tape, about 1/2". Carefully stretch and shape the bias tape around the curve of the neckline.

Using the creases of the bias tape as a guide, fold the bias tape toward the wrong side of the bodice completely encasing the raw edges. Press well and topstitch 1/8" from the edge of the bias tape catching the inner folded edge on the wrong side. Trim the bias tape ends even with the bodice edge.

Open up the 1/2" bias tape and pin one long edge along the neck opening right sides together. Begin at the one lower point of the criss-cross bodice piece and end at the other lower point. Extend the tape beyond the base of the bodice, so you can trim it even later.
Stitch the bias tape to the bodice along the first fold line of the bias tape, about 1/2". Carefully stretch and shape the bias tape around the curve of the neckline.
Using the creases of the bias tape as a guide, fold the bias tape toward the wrong side of the bodice completely encasing the raw edges. Press well and topstitch 1/8" from the edge of the bias tape catching the inner folded edge on the wrong side. Trim the bias tape ends even with the bodice edge.
Cross the font bodice pieces one side over the other lining up the 2 sets of notches at the bottom of the bodice pieces. Baste across the bottom raw edge 1/4" from the edge to close up the bodice.
That's it for today! Note: I am not showing lining for this sew-along. For the optional lining, follow the instructions on page 4 of the pattern.
See the rest of the Kyoko Sew-Along here:
No comments:
Post a Comment